

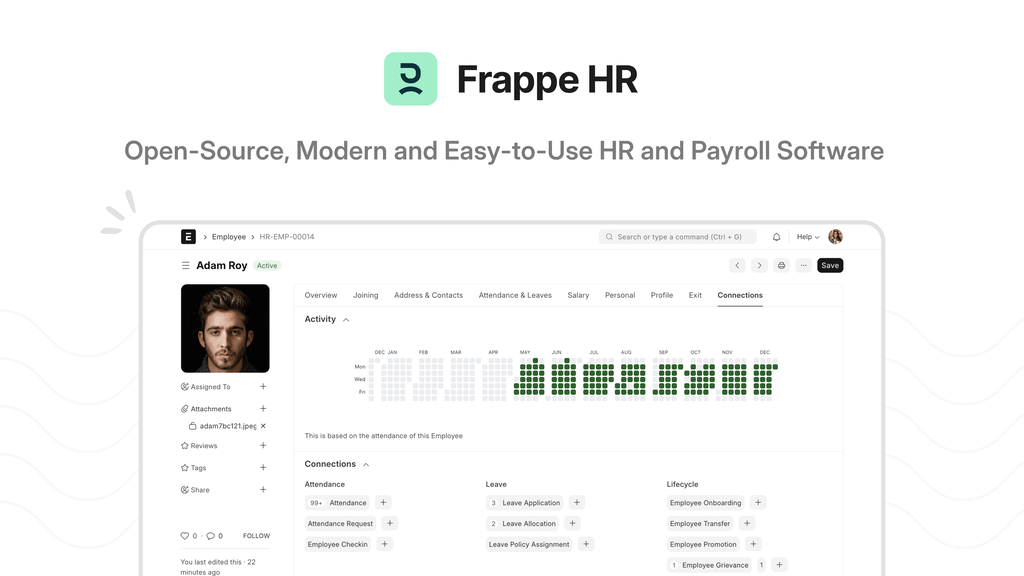

Most people discover ERPNext through its accounting, inventory, or manufacturing modules. The HR side tends to get noticed later, usually when someone realizes the company has outgrown spreadsheets for tracking leave balances and the payroll process involves three different pieces of software and a prayer.
The ERPNext HR module is not as flashy as the manufacturing planning screen. It won’t impress you with colorful dashboards. What it does is handle the unglamorous, compliance-heavy, absolutely essential work of managing people. Employee records, attendance, leave, expenses, payroll, performance reviews, recruitment. All of it lives in one place and talks to accounting without anyone manually exporting a CSV.
If you are looking at the HR module for the first time, this walkthrough covers what you actually need to know. Not every field and checkbox, but the parts that matter when you are setting things up and the parts that cause problems if you get them wrong.
What the HR Module Actually Does
Before diving into configuration, it helps to understand what the module covers and what it does not.
Included out of the box:
- Employee master records with personal details, employment history, documents, and reporting structure
- Attendance tracking with shift management and biometric device integration
- Leave management with customizable leave types, accrual policies, and approval workflows
- Expense claims with multi-level approval and accounting integration
- Payroll with salary structures, earnings and deductions, tax calculations, and payslip generation
- Recruitment from job opening to offer letter
- Performance appraisals with configurable review templates
- Employee onboarding and separation workflows
What it does not do out of the box is substitute for a local payroll provider that handles tax filings. ERPNext can calculate payroll accurately, but actually submitting payroll taxes to government agencies usually requires either manual data entry on a government portal or a country-specific customization. Know that going in. The module handles the math, the records, and the journal entries. The actual filing is on you or your accountant.
Setting Up the Basics in the Right Order
There is an order that makes setup smoother. Skip ahead and you find yourself recreating things.
First, the Company structure. Before you add a single employee, make sure your Company record is complete. The HR module pulls company details like the default letterhead, the fiscal year, and the default currency from there. If your company address is wrong, your offer letters will have the wrong address.
Second, the Department tree. Go to the Department doctype and build out your organizational structure. Engineering, Sales, Operations, Finance, whatever your company actually has. You can nest departments. Sales could have sub-departments for Inside Sales and Field Sales. This tree determines who reports to whom on paper and it feeds into leave approvals, expense claim routing, and payroll cost center allocation. Spend time getting this right. Changing it later means updating every employee record linked to a department that got renamed or moved.
Third, designations and branches. Designations are job titles. Software Engineer, Account Manager, Warehouse Supervisor. Create the ones your company uses. Branches are physical locations if you operate out of more than one office. Both are optional but useful for filtering reports.
Fourth, employment types. Full-time, part-time, contractor, probation, intern. These matter because leave policies and salary structures often differ by employment type. Define them before you create employees.
None of this is exciting work. It is setup work. But doing it thoroughly means that when you create your first employee record, all the dropdowns are populated with real values instead of placeholder junk you have to fix later.
Employee Records: The Master Document
The Employee doctype is where everything ties together. An employee record links to a User account for system access, holds personal information, defines the employment terms, stores documents like contracts and IDs, and tracks the entire lifecycle from onboarding through to exit.
Start with one employee and treat it as your template. Create the record, fill in every field that applies, and note what feels missing. Add custom fields for anything specific to your company or jurisdiction: passport numbers, visa expiry dates, emergency contacts, bank account details for salary transfer, next of kin. Do this before you create the other forty-nine employees. It is much faster to duplicate a complete record than to add the same custom fields to fifty records one by one.
A few fields worth paying attention to:
- User ID. If the employee needs to log into ERPNext, link their Employee record to a User account. This is how the system knows that the person logging in as john.doe is the same person whose leave applications and expense claims need approval routing. Without this link, the self-service features of the HR module do not work.
- Date of Joining. This drives leave accrual, payroll eligibility, and probation period tracking. Get it right. It seems obvious but you would be surprised how many companies guess at join dates for long-serving employees during data migration and end up with leave balances that do not tie out.
- Reports To. This builds the approval hierarchy. If you set it correctly, a leave application automatically routes to the right manager. If you skip it, every leave request goes to whoever has the HR Manager role, which is usually not what you want for a fifty-person company.
- Salary Mode. Bank transfer, cash, cheque. This determines how payroll processes payment. If you pay by bank transfer, you need bank account details on the employee record.
Attendance: The Quiet Foundation
Attendance data feeds into payroll. Missed days without a leave application become loss of pay. Overtime hours become extra earnings. If your attendance records are wrong, your payroll is wrong.
ERPNext gives you several ways to capture attendance:
Manual entry. Someone in HR marks attendance daily. This works for a ten-person office where everyone is visible. It does not work at scale.
Biometric integration. ERPNext can pull attendance logs from biometric devices through an auto-attendance feature. Using our Automatic Attendance API module, that automatically fetchs records from your device, or the device exports a CSV of check-in and check-out events. ERPNext maps those events to employee shifts and creates attendance records automatically. This is the most common approach for manufacturing and warehouse environments. Setup requires mapping the device’s employee IDs to ERPNext employee IDs and configuring shift timings, but once it is running the manual work drops to near zero.
Employee self-check-in. Employees mark their own attendance through the ERPNext web interface or mobile app. This works for knowledge workers and remote teams. It relies on trust, or you can configure IP-based restrictions that only allow check-in from the office network.
Whichever method you pick, set up shifts first. A shift defines start time, end time, late entry grace period, early exit grace period, and whether the shift crosses midnight. Assign shifts to employees. Without shifts, the system cannot calculate late hours, early departures, or overtime.
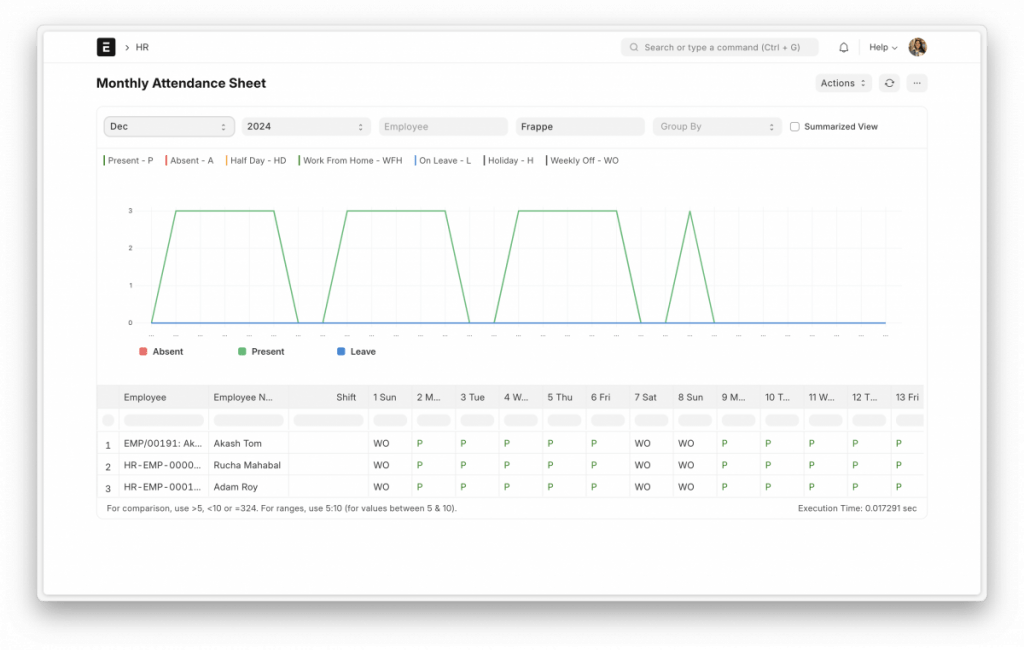
Attendance records are generated daily. You can view them in the Attendance calendar, which shows a color-coded grid of present, absent, on leave, and holiday for each employee. It is one of the more useful screens in the module and worth showing to HR staff during training.
Leave Management: Where the Spreadsheet Dies
Leave is the part of HR that spreadsheet-based companies struggle with the most. Someone has a leave balance in their head. Someone else has a different number in a spreadsheet. The employee who went on vacation last month discovers their leave application was never actually approved and now payroll has deducted three days of salary. It is a mess.
ERPNext replaces all of that with a system that tracks leave balances in real time, enforces approval workflows, and syncs with payroll automatically.
Setup order matters here too:
1. Holiday List. Create a holiday list for the year. Include public holidays and company-wide closure days. Employees on leave during a holiday do not get the holiday deducted from their leave balance. The system just skips those days. Create separate holiday lists if you operate in multiple regions with different public holidays.
2. Leave Types. Define the categories of leave your company offers. Sick leave, casual leave, annual leave, maternity leave, paternity leave, unpaid leave, compensatory leave. For each leave type, decide whether it is paid or unpaid, whether employees can carry forward unused days to the next year, whether there is a maximum carry-forward limit, and whether the leave type allows negative balances.
3. Leave Policy. This is where you set how many days of each leave type an employee gets, and on what schedule. You can allocate annually, monthly, or on a custom schedule. A leave policy gets assigned to an employee. When their allocation date arrives, the system credits the days automatically. No manual intervention.
4. Leave Allocation. This is the actual credit of leave days to an employee. It happens automatically based on the leave policy but you can also create manual allocations for one-off situations.
5. Leave Application. The employee submits a leave request. It routes to their manager based on the Reports To field. The manager approves or rejects. The leave balance decreases automatically. Attendance records for the leave days are generated automatically. Payroll is informed automatically. The whole chain runs without HR touching anything.
One detail that new users often miss: the Compensatory Leave system. If an employee works on a holiday or a weekly off day, you can mark that day as compensatory leave eligible. The system credits a compensatory leave day to their balance. They can use it later. This is handled through the Attendance doctype by checking a box called “Compensatory Leave Request.” Not everyone needs this but manufacturing companies with weekend shifts rely on it heavily.
Expense Claims: Small Transactions, Big Paper Trail
Employees spend money on behalf of the company. Travel, supplies, client meals, whatever. They need to get reimbursed. The expense claim system handles this from submission through approval to accounting entry.
An employee creates an Expense Claim, lists the expenses with dates, amounts, categories, and supporting documents as attachments. The claim routes to their manager and possibly to a finance approver depending on how you configure the workflow. Once approved, the system creates a journal entry that debits the expense account and credits the employee’s payable account. When the company pays the employee, that payment clears the payable.
The integration with accounting is what separates this from an email with receipts attached. The expense hits the right cost center. It appears in financial reports. It is traceable during an audit. The employee can see the status of their claim instead of asking HR “did you process my reimbursement yet.”
Setup involves creating Expense Claim Types (travel, food, office supplies, mileage) and linking them to the appropriate general ledger accounts. Make sure the accounts exist in your chart of accounts first. If you have cost centers, configure them so expenses hit the employee’s department automatically.
Payroll: The Part That Scares Everyone
Payroll is the module where mistakes have consequences. An employee who is underpaid will notice within hours. An employee who is overpaid is hard to recover money from. Tax authorities are not forgiving of errors. This section is the one you should test most thoroughly before running a live payroll cycle.
The payroll engine works through a few connected concepts.
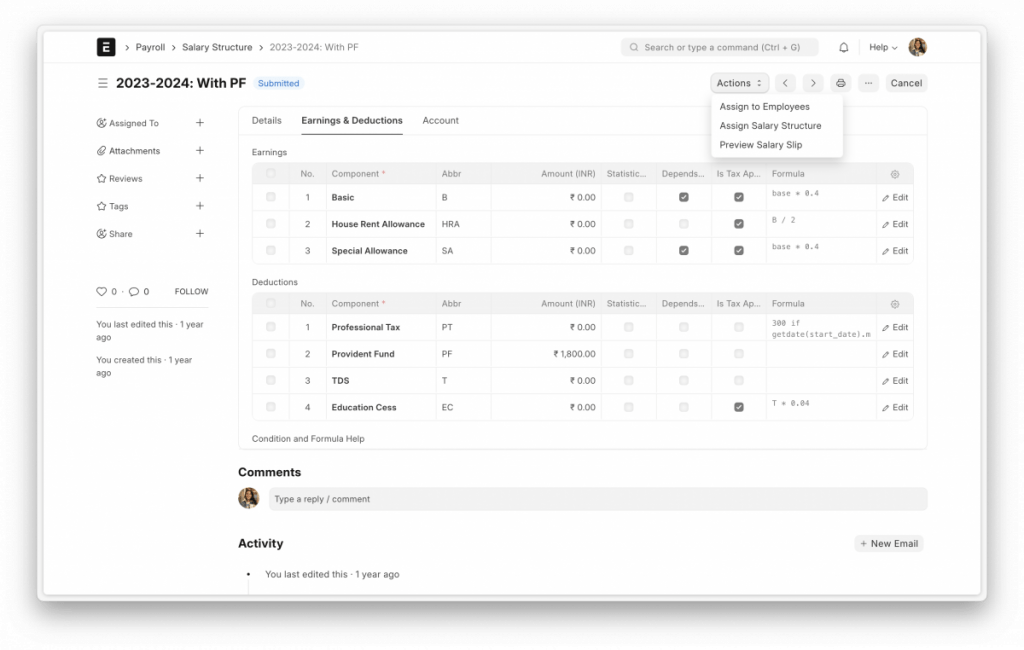
Salary Structure. This is the template for how an employee gets paid. It contains Salary Components: earnings like Basic, House Rent Allowance, Transport Allowance, and deductions like Income Tax, Social Security, Loan Repayment. Each component has a formula or a fixed amount. Formulas can reference other components. For example, House Rent Allowance might be “Basic * 0.4” meaning forty percent of the basic salary.
Salary Structure Assignment. Assign a salary structure to an employee with an effective date. An employee can have different structures over time. The assignment with the most recent date applies. This is how you handle promotions, raises, and role changes.
Salary Slip. This is the monthly payslip for a single employee. It pulls the applicable salary structure, applies the formulas, incorporates attendance data to calculate deductions for unpaid leave or additions for overtime, and generates a journal entry that debits salary expense and credits the employee payable and tax payable accounts.
Payroll Entry. This is the batch processing tool. Instead of creating salary slips one by one, you create a Payroll Entry for a pay period, select the employees or departments, and the system generates all the salary slips at once. You review, make adjustments if needed, and submit. The journal entries post to the general ledger.
The complexity in payroll is not the software. It is knowing how to set up the salary components correctly for your country’s tax and labor laws. ERPNext comes with some country-specific payroll setups out of the box. India has a comprehensive payroll module. Other countries may require configuration from scratch. This is where a local accountant or an ERPNext consultant with experience in your jurisdiction pays for themselves quickly. Do not guess at tax formulas.
Before running your first live payroll, run a dummy payroll for a test employee. Check the salary slip amounts. Check the journal entries. Have an accountant verify the numbers. Repeat until the output is clean. Only then pay real employees.
Recruitment and Onboarding: The Pipeline You Might Not Need Yet
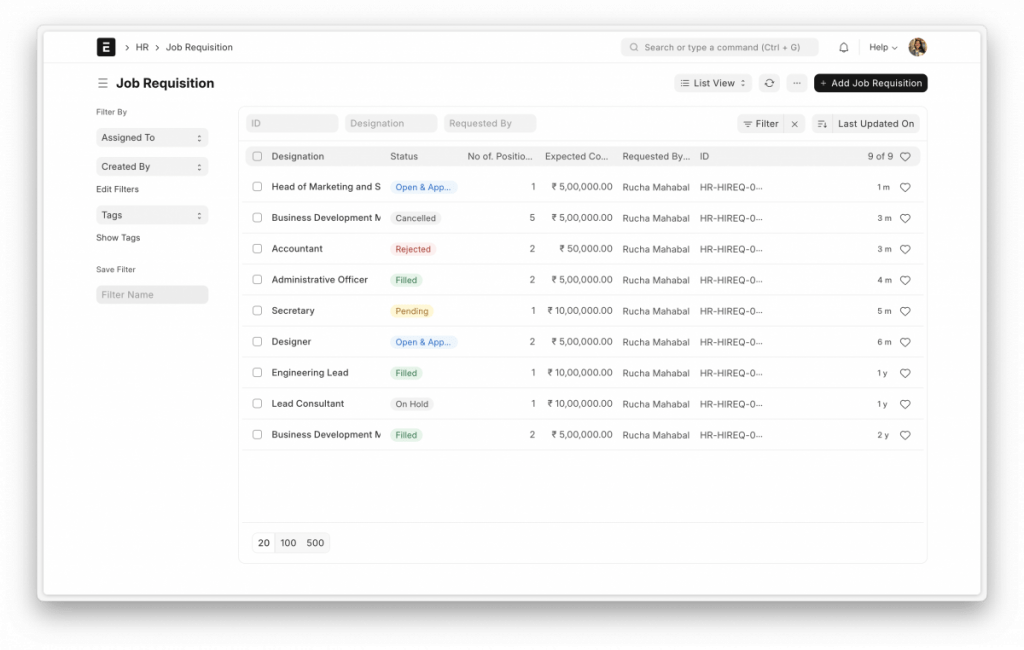
The recruitment module tracks job openings, applications, interviews, and offers. If you hire five people a year, you probably do not need it. A spreadsheet works fine. If you hire fifty people a year across multiple departments, the structure starts to justify itself.
A Job Opening gets created for a position. Candidates apply, either through the ERPNext careers page or by having their details entered manually. Applications move through stages: Received, Shortlisted, Interview Scheduled, Interviewed, Offer Extended, Accepted, Rejected. At each stage, the responsible person is notified and can take action. When a candidate accepts, the system can create an Employee record automatically from the application data.
The onboarding module kicks in once an employee joins. You create an Onboarding Template with a list of tasks: IT setup laptop, HR prepare welcome kit, manager schedule orientation meeting, finance add to payroll. Assign the template to the new employee and each task gets assigned to the relevant person with a due date. It is simple but it prevents the situation where a new hire shows up on day one and nobody remembered to create their email account.
Small and medium businesses often skip these modules during initial setup and add them later when hiring volume increases. That is a reasonable approach. Do not feel pressure to configure everything on day one.
Employee Self-Service: The Part Your Team Will Actually Like
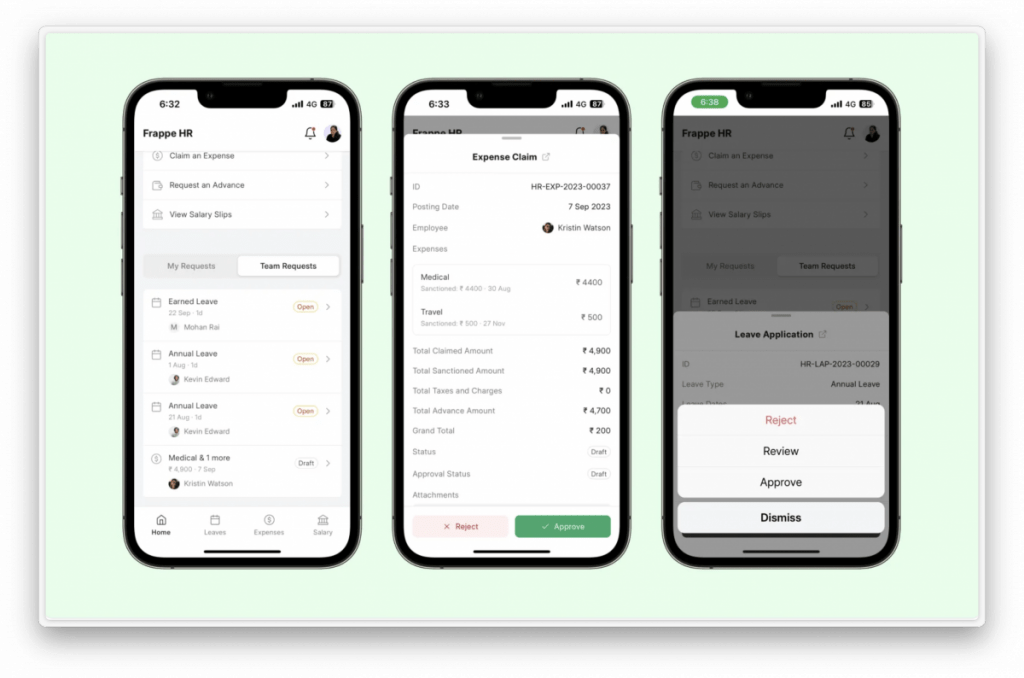
A lot of HR software is built for HR people. Employees only interact with it when they are submitting something or checking something. ERPNext gives employees a portal where they can view their own information, apply for leave, submit expense claims, check their payslips, and update their personal details.
For this to work, each employee needs a User account linked to their Employee record. The portal is permission-aware. An employee sees their own salary slips, not anyone else’s. Their leave balance, not the department’s. Their own attendance, not the company’s.
This self-service aspect reduces the administrative load on HR. Employees check their own leave balances instead of emailing HR. They download their own payslips instead of requesting copies. They update their own addresses and phone numbers instead of filling out a form and waiting for someone to key it in. It seems small but in a thirty-person company, these small requests add up to hours per week.
Reports That Actually Matter
The HR module ships with a lot of reports. Most you will look at once and never again. A few are genuinely useful.
Employee Leave Balance. Shows every employee, their leave type, allocated days, used days, and remaining balance. This is the report managers ask for before approving long vacations.
Monthly Attendance Sheet. A grid of employees across the top and days of the month down the side, with P for present, A for absent, L for leave, H for holiday. Useful for payroll verification and for posting on the notice board if your workplace does that.
Salary Register. The payroll summary for a period. Shows every employee, their gross pay, deductions, and net pay. This is what the finance team reviews before releasing salaries.
Bank Remittance Report. If you pay salaries by bank transfer, this report generates the data you need to upload to your bank’s payment system. Employee names, bank account numbers, and net pay amounts.
All of these reports can be filtered by department, branch, designation, and date range. Export to Excel or PDF works reliably. If you need a report the system does not provide, creating a custom report through the Report Builder is possible without coding, though for complex reports you might need a developer.
The Integration With Accounting That Makes Everything Easier
The single biggest advantage of running HR and accounting in the same system is that payroll journals, expense reimbursements, and tax liabilities flow automatically into the general ledger. There is no manual step where HR sends a file to finance and finance keys in journal entries.
When payroll runs, the system creates a journal entry. Salary expense is debited. Employee payables are credited. Tax payables are credited. When the company pays the salaries, that payment clears the employee payables. When the company remits taxes, that payment clears the tax payables. The trial balance always reflects reality because the transactions originate in the HR module and post to accounts automatically.
If your HR and accounting systems are separate, this flow probably involves spreadsheets, manual entries, and a monthly reconciliation that consumes a day of someone’s time. Bringing them together is one of the largest time savings an integrated ERP provides. It is worth the effort of setting up payroll correctly just to eliminate that monthly manual work.
What to Do First and What Can Wait
If you are looking at the HR module for the first time and feeling overwhelmed by the number of screens, here is a practical sequence.
Week one: Set up the foundation. Departments, designations, employment types, holiday list. Create employee records with accurate join dates, reporting structure, and salary mode. Get the basics right because everything else builds on them.
Week two: Implement leave management. Leave types, leave policies, leave allocations. Train employees on submitting leave applications. Train managers on approving them. Get this flowing before you touch payroll.
Week three: Configure attendance. Decide on your capture method. Set up shifts. If using biometric integration, get the device mapping working and run it for a few days to verify attendance records are generated correctly.
Week four: Tackle payroll. Build salary structures. Test on dummy employees. Verify with an accountant. Run a parallel test where you run payroll in the new system and compare it to your current payroll output. Do not switch over until the numbers match.
Month two: Roll out expense claims if employees incur reimbursable expenses. Enable the employee self-service portal if you have not already. Train people on checking their own leave balances and payslips.
Month three and beyond: Consider recruitment and onboarding if your hiring volume justifies it. Explore performance appraisals if you want to formalize review cycles. Build custom reports if the standard ones do not cover your needs.
The module does a lot. You do not have to use all of it. Start with the pieces that cause the most pain in your current process, get those working well, and expand from there.
A Few Things That Will Prevent Headaches
Back up before running payroll. Every single time. If something goes wrong during payroll processing, you want a clean restore point. This is not paranoia. It is experience.
Create a test employee. A permanent dummy record you use to test salary structures, leave policies, and payroll runs. Never delete it. You will need it again next time you change something.
Document your customizations. If you add custom fields, write a script, or modify a formula, write down what you changed and why. When you upgrade ERPNext to a new version, this documentation is what tells you whether the upgrade broke anything HR-related.
Review permissions carefully. The default HR Manager role has broad access. Give it only to people who need it. Create a limited HR User role for staff who handle leave management and attendance but should not see payroll data. Payroll information is sensitive. Access to it should be minimal.
Check leave balances monthly. Even though the system calculates them automatically, have someone verify that the balances look reasonable. A misconfigured leave policy can allocate zero days to everyone and you will not notice until someone tries to take a vacation and the system says they have no leave.
The HR module does not demand attention the way manufacturing or accounting does. It does its work quietly, tracking attendance, accruing leave, calculating salaries, posting journals. The value is in the absence of problems. Payroll runs on time. Leave balances are accurate. Expense claims get reimbursed. Employees find their own payslips. HR spends less time on data entry and more time on things that matter.
That is what a properly configured HR module delivers. It just takes some upfront work to get there.
We help businesses set up and run ERPNext at erpnext.space. If you are deploying the HR module and want guidance on configuration, payroll setup, or migrating from another system, we are here to help. No pressure, just practical advice from people who do this every da